5 Photography Tips For More Confident Picture-Taking // Boise Senior, Boudoir, & Family Photographer
I’m sure you’ve heard (or said) it before:
“I’m so awkward whenever I take photos!”
“I don’t know what to do with my (or my subject’s) hands!”
“I hate having my photo taken.”
And so on and so forth. Believe me, I understand, cause I was there once before!
Whether you’re wanting to step up your Family Christmas photo game, you’re a budding photographer looking to improve your angles and posing, or you’d just like better ideas on how to “pose” when having YOUR photo taken, below are some of my favorite quick tips and tricks to ensure you feel more confident when taking photos!
Tip Number 1:
“Before You Shoot, Take the Loot!”

Nothing ruins a perfect photo like a hair tie on the wrist, giant iphone X jutting out of a back pocket and giving you a square butt, or keys and other things dangling from your clients’ jeans and making you think “UGH, why did that have to ruin an otherwise GREAT photo??”
Therefore, I made up the phrase “Before you shoot, take the loot!” It’s a super silly pirate phrase, but you’ll probably never forget it now! 😉 Before every session (or whenever I take a stranger’s family photo on vacation), I make sure myself (or my subject’s) don’t have any extra “loot” on them before taking their photo. Once this is done, you’re ready to show off only the good stuff! Which leads me to my next tip…
Tip Number 2:
“Pop that Toe!”
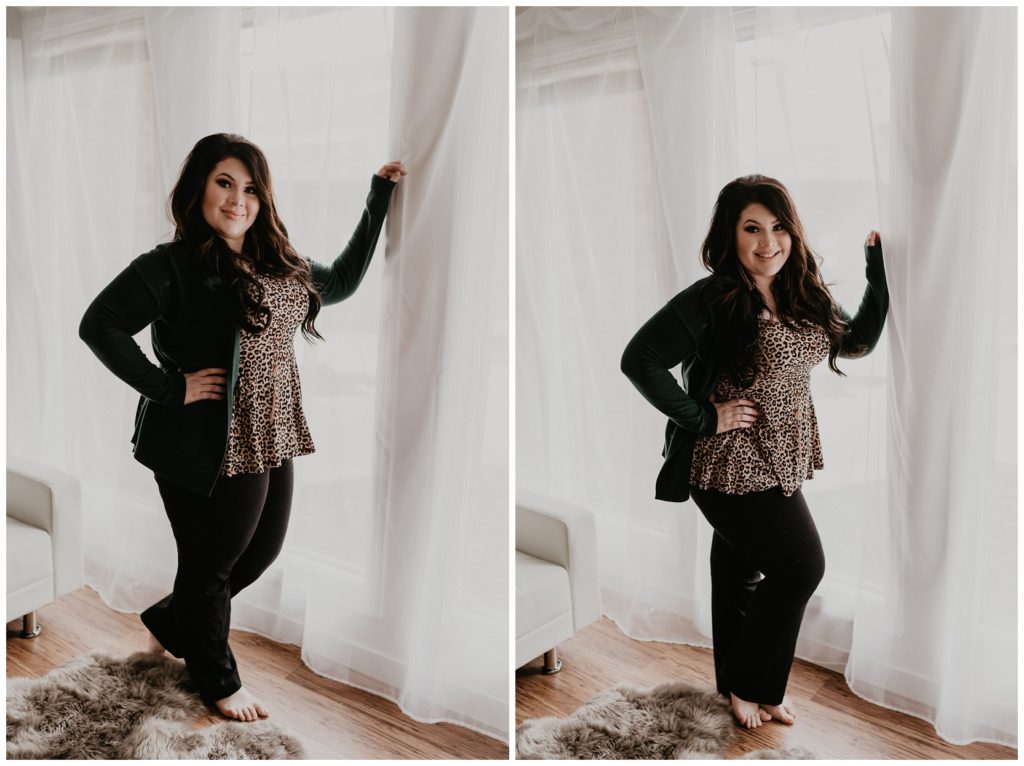
For the typical sorority sister, the “hand on the jutting-hip” pose is great for those looking to add some “ba boom” to their boo-tay. (No shame sister, if you’ve got it, flaunt it!)
Regardless, depending on what you’re looking for, a simple toe pop can make all the difference in the world to giving you that beautiful “S” curve that is so flattering, and slim down those hips, thighs, and give those calves some definition, too! For example, you’ll see the difference that this posing trick can give in the above photos.
FOR PHOTOGRAPHERS: This pose is ESPECIALLY crucial and life-changing when shooting boudoir or maternity! Look for the leg “closest” to the camera and remind your clients to shift their weight to the back hip, and pop up on those front toes instead!
If you loved this one, then you’ll also LOVE tip number 3…
Tip Number 3:
“Gimme Some Shoulder!”
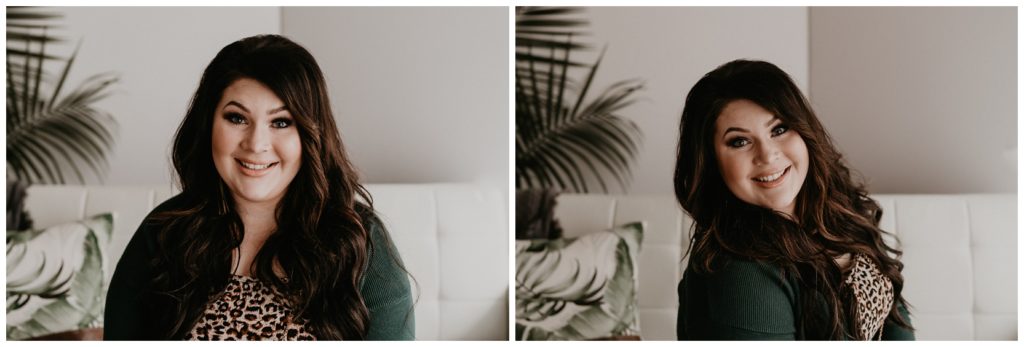
Have you ever heard the old phrase “Don’t be such a square”? In the world of photography, it still applies! If you’ve ever had your photo taken and wondered why the heck you look like a running quarterback, chances are you were facing the camera straight on, vs turning to the side!
In the left, I had Arielle face me normally. As a result, this photo and pose creates an unflattering, uninteresting “square” shape with her shoulders and face. However, in the top right photo, I asked Arielle to simply “give me some shoulder!” so that she could more easily arch her back, giving her a more flattering “S” shape in the second photo.
Another way to look at it: Give the camera your good side! Chances are, you have a side of your face that you “Favorite”. Don’t be afraid to turn and show that off the next time you’re standing at Disneyland, waiting patiently for the person who offered to take your photo to figure out how to turn the camera back from selfie mode.
Tip Number 4:
“THUMBS OUT!”
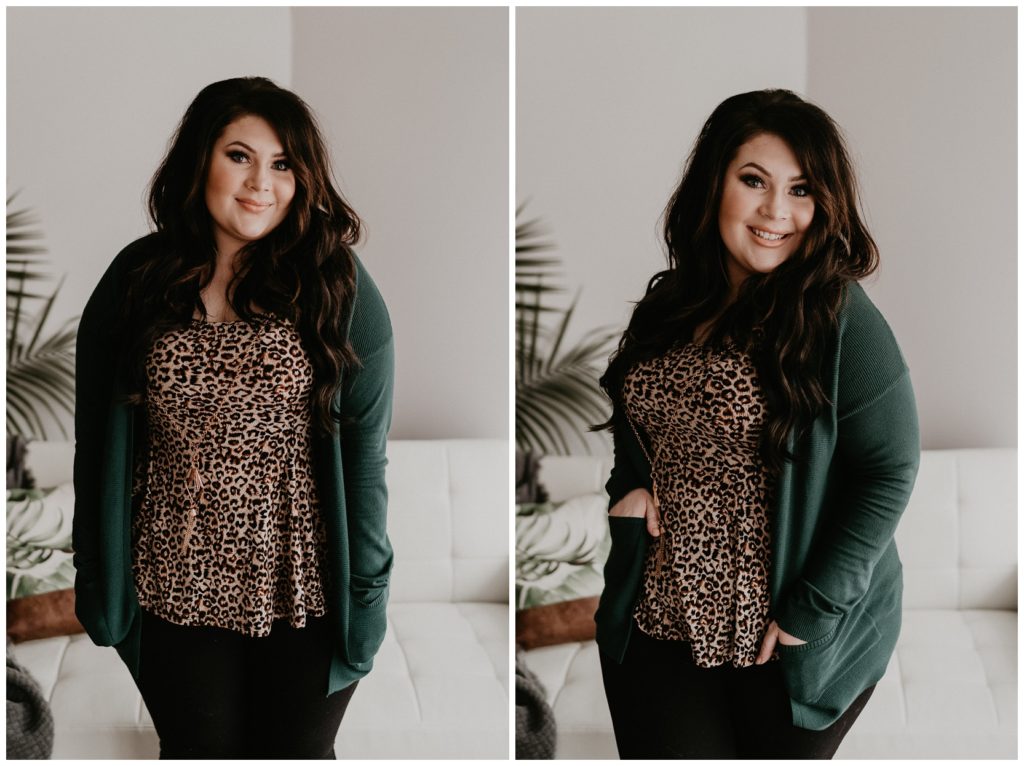
The last thing we want to look like when getting our photos taken are looking like A) We lost all of our fingers in a freak cooking-class accident, or B) Like we lost all movement in our hands and arms and are forever cursed to have them hang limply by our sides for the rest of time.
So, watch those hands! If you aren’t sure what to do with your hands (or your client’s!), use things like pockets, hair, necklaces, sweaters, family members, etc, to get those limbs moving!
Avoid shoving your hands completely in your pockets. Sticking a thumb out shows us that you’ve got something there!
Bending the elbows gives us (can you guess?) the “S” shape! Gently grabbing onto your jacket, playing with your hair, a gentle hand on the hip, or putting an arm around the person next to you avoids those harsh, straight lines, and provide more movement and dynamic to your pose!
Now, are you ready for my final, easily most “magical” tip?
Tip Number 5:
ANGLES ANGLES ANGLES
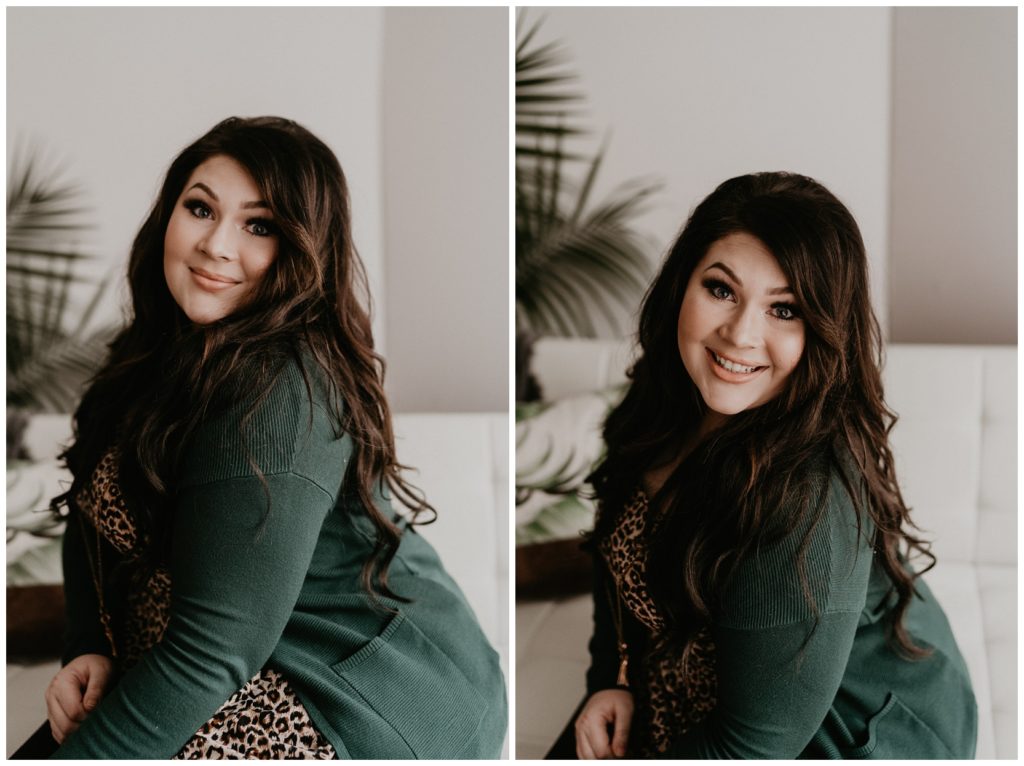
For my final tip, we unfortunately won’t be using any of your geometry notes! But chances are, this is one of the more common mistakes and confidence tankers out there. UNFLATTERING ANGLES!
I’m convinced the phrase “The camera adds 10 lbs” came from someone who decided to take a photo from the perspective of an ant, cause that’s what it takes to truly add 10 lbs when taking a photo!
However, there’s a way we can avoid this: by remembering anything closest to the camera is going to appear the largest, and furthest from the camera will appear smallest. That’s why it’s a big NO NO to shoot from way down low, if you’re trying to avoid adding unnecessary weight, double chins, or big thighs to yourself or your subject!
So, concerned with looking slimmer? GET UP HIGH, and shoot DOWN! This lets those hips and chins fade into the background, and puts your pretty smile front and center for all to see.
Finally, when we put it all together…
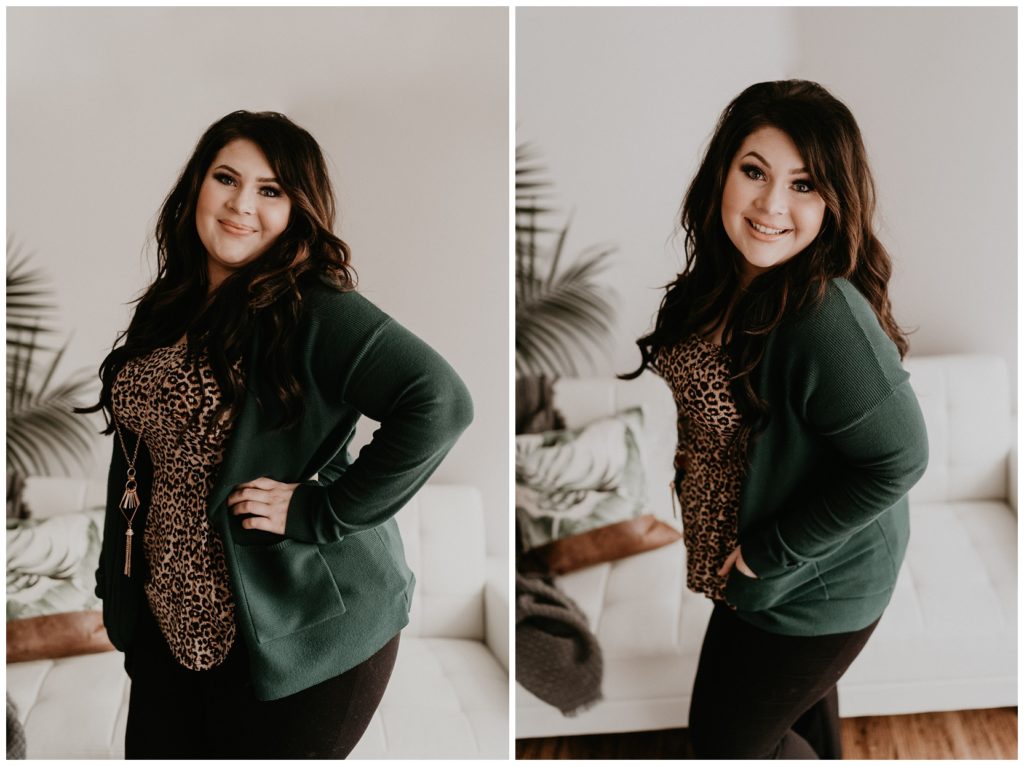
From left to right, NOTHING changed in these photos except applying all of these tips I told you about today! No photoshop, no different lighting, nothing. And yet it looks like two completely different people standing in front of you, am I right?
I hope these tips help you feel more confident the next time you are in front of (or behind) the camera! Life’s too short for bad photos- get out there, make some memories, and feel good about documenting them too!
Makayla
December 24, 2020
These tips are great!! Thanks so much!